Daniel Tian’s Professional Blog

Icon

Just another WordPress.com weblog

XNA Tutorial: typewriter text box with proper word wrapping – Part 3

This is Part 3 of 3 and covers how to make the text ‘type out’ letter by letter.
Go to Part 1
Go to Part 2

In Part 2 of the tutorial, we implemented proper text wrapping to display text inside the text box. Now we’ll make the text ‘type out’.

Typing the text
So now that we finally have the text wrapping down, we can remove the red debug box. Comment out the Draw() line in the Draw() method that draws the text box. The words will still wrap properly, the only thing we turned off was the drawing of the text box. Now we’re ready to type the text. First we need to create some new instance variables:

Instance variables:

String parsedText;
String typedText;
double typedTextLength;
int delayInMilliseconds;
bool isDoneDrawing;

And then we set the variables, put this code in the LoadContent() method at the end:

parsedText = parseText(text);
delayInMilliseconds = 50;
isDoneDrawing = false;

What this does is it first parses the text into a correctly-formatted string. This is what the text will look like once it’s completely done typing. typedText will hold the text that should be displayed on every Update() call, and delayInMilliseconds is the amount of time to wait between each character displayed. The boolean is set to true once the entire string is displayed and is used in case the game logic needs to know when the text is done drawing (for example, to display a message that says ‘Click to continue’).

Now we just need to add some code to the Update() method, after the TODO comment and before base.Update(gameTime):

if (!isDoneDrawing)
{
    if (delayInMilliseconds == 0)
    {
        typedText = parsedText;
        isDoneDrawing = true;
    }
    else if (typedTextLength < parsedText.Length)
    {
        typedTextLength = typedTextLength + gameTime.ElapsedGameTime.TotalMilliseconds / delayInMilliseconds;

        if (typedTextLength >= parsedText.Length)
        {
            typedTextLength = parsedText.Length;
            isDoneDrawing = true;
        }

        typedText = parsedText.Substring(0, (int)typedTextLength);
    }
}

This code block might seem a little complicated compared to what we’ve been doing so far, but it’s quite easy to understand. First, it checks to see if isDoneDrawing is set to true. If it’s false, it then checks to see if the delay is 0. If it is, it displays the complete text string all at once. Otherwise, we check typedTextLength with parsedText.Length. If typedTextLength is less, that means the text isn’t fully printed out yet. The next few lines might seem confusing, but let me explain.

We want to type the text out character by character. The easiest way to do this is to simply add a character on every Update() call. However, there are some problems with this method. If you use the default 60 FPS in XNA, the fastest speed is 1 letter every 17 milliseconds. You can’t go any faster than that speed because it’s limited by the number of Update() calls. If we remove the polling rate limiter, then the text will display too fast. On my computer, removing the limit gives me 6000 FPS. That means that there are theoretically 6000 Update() calls per second (in real life the number of calls is lower because each call takes some time to process), causing the text to display instantaneously.

So what’s a solution that’s framerate-independent? The answer is to use the elapsed game time. Because the game time flows at the same rate regardless of the FPS, we’ll use it as our counter. Going back into the code, you can see that we have the variable typedTextLength. We have to use it because we need to check to see if this length is longer than the length of parsedText. If you try to print out a substring that is longer than the actual string length, it will cause an exception, so this check prevents us from doing so. We divide gameTime.ElapsedGameTime.TotalMilliseconds by delayInMilliseconds to get the number of characters we need to add. Assuming a delay of 50 milliseconds, for every 50 milliseconds that’s passed, we want to add one more character, and the division gives us the correct number of characters to add. This method works especially well for games that don’t limit the polling rate because each update will add a small amount to typedTextLength, but eventually they will add up to 1 and and the next character is displayed.

Ok, now we just need to change one last bit of code to see the effects. Change the DrawString call in the Draw() method so that it looks like this:

From:
spriteBatch.DrawString(font, parseText(text), new Vector2(textBox.X, textBox.Y), Color.White);

To:
spriteBatch.DrawString(font, typedText, new Vector2(textBox.X, textBox.Y), Color.White);

And there you have it, typewriter text box with proper word wrapping! If you run the program now, it should look like this:

textbox7

Conclusion
This conclues Part 3 of the tutorial. We made the text type out letter by letter with a delay that we set, and it works properly regardless of framerate. The next step is to put all the text box code into a separate class so it can be reused, but I’ll leave that as an exercise for you. Thank you for reading through my tutorial, and please leave me feedback!

Source code
This is what your Game1.cs should look like at the end of this tutorial.

using System;
using System.Collections.Generic;
using System.Linq;
using Microsoft.Xna.Framework;
using Microsoft.Xna.Framework.Audio;
using Microsoft.Xna.Framework.Content;
using Microsoft.Xna.Framework.GamerServices;
using Microsoft.Xna.Framework.Graphics;
using Microsoft.Xna.Framework.Input;
using Microsoft.Xna.Framework.Media;
using Microsoft.Xna.Framework.Net;
using Microsoft.Xna.Framework.Storage;

namespace TextBox
{
    /// <summary>
    /// This is the main type for your game
    /// </summary>
    public class Game1 : Microsoft.Xna.Framework.Game
    {
        GraphicsDeviceManager graphics;
        SpriteBatch spriteBatch;
        Rectangle textBox;
        Texture2D debugColor;
        SpriteFont font;
        String text;
        String parsedText;
        String typedText;
        double typedTextLength;
        int delayInMilliseconds;
        bool isDoneDrawing;

        public Game1()
        {
            graphics = new GraphicsDeviceManager(this);
            Content.RootDirectory = "Content";
        }

        /// <summary>
        /// Allows the game to perform any initialization it needs to before starting to run.
        /// This is where it can query for any required services and load any non-graphic
        /// related content.  Calling base.Initialize will enumerate through any components
        /// and initialize them as well.
        /// </summary>
        protected override void Initialize()
        {
            // TODO: Add your initialization logic here
            textBox = new Rectangle(10, 10, 300, 300);

            base.Initialize();
        }

        /// <summary>
        /// LoadContent will be called once per game and is the place to load
        /// all of your content.
        /// </summary>
        protected override void LoadContent()
        {
            // Create a new SpriteBatch, which can be used to draw textures.
            spriteBatch = new SpriteBatch(GraphicsDevice);

            // TODO: use this.Content to load your game content here
            debugColor = Content.Load<Texture2D>("solidred");
            font = Content.Load<SpriteFont>("font");
            text = "This is a properly implemented word wrapped sentence in XNA using SpriteFont.MeasureString. A B C D E F G H I J K L M N O P Q R S T U V W X Y Z a b c d e f g h i j k l m n o p q r s t u v w x y z";
            parsedText = parseText(text);
            delayInMilliseconds = 50;
            isDoneDrawing = false;
        }

        /// <summary>
        /// UnloadContent will be called once per game and is the place to unload
        /// all content.
        /// </summary>
        protected override void UnloadContent()
        {
            // TODO: Unload any non ContentManager content here
        }

        /// <summary>
        /// Allows the game to run logic such as updating the world,
        /// checking for collisions, gathering input, and playing audio.
        /// </summary>
        /// <param name="gameTime">Provides a snapshot of timing values.</param>
        protected override void Update(GameTime gameTime)
        {
            // Allows the game to exit
            if (GamePad.GetState(PlayerIndex.One).Buttons.Back == ButtonState.Pressed)
                this.Exit();

            // TODO: Add your update logic here
            if (!isDoneDrawing)
            {
                if (delayInMilliseconds == 0)
                {
                    typedText = parsedText;
                    isDoneDrawing = true;
                }
                else if (typedTextLength < parsedText.Length)
                {
                    typedTextLength = typedTextLength + gameTime.ElapsedGameTime.TotalMilliseconds / delayInMilliseconds;

                    if (typedTextLength >= parsedText.Length)
                    {
                        typedTextLength = parsedText.Length;
                        isDoneDrawing = true;
                    }

                    typedText = parsedText.Substring(0, (int)typedTextLength);
                }
            }

            base.Update(gameTime);
        }

        /// <summary>
        /// This is called when the game should draw itself.
        /// </summary>
        /// <param name="gameTime">Provides a snapshot of timing values.</param>
        protected override void Draw(GameTime gameTime)
        {
            GraphicsDevice.Clear(Color.CornflowerBlue);

            // TODO: Add your drawing code here
            spriteBatch.Begin();
            // spriteBatch.Draw(debugColor, textBox, Color.White);
            spriteBatch.DrawString(font, typedText, new Vector2(textBox.X, textBox.Y), Color.White);
            spriteBatch.End();

            base.Draw(gameTime);
        }

        private String parseText(String text)
        {
            String line = String.Empty;
            String returnString = String.Empty;
            String[] wordArray = text.Split(' ');

            foreach (String word in wordArray)
            {
                if (font.MeasureString(line + word).Length() > textBox.Width)
                {
                    returnString = returnString + line + '\n';
                    line = String.Empty;
                }

                line = line + word + ' ';
            }

            return returnString + line;
        }

    }
}

Filed under: XNA Tutorials, , , , , , , , , , , ,

XNA Tutorial: typewriter text box with proper word wrapping – Part 2

This is Part 2 of 3 and covers how to display text inside the text box created in Part 1.
Go to Part 1
Go to Part 3

In Part 1 of this tutorial, we created the text box using a Rectangle object and drew it to the screen. Now we’ll put some text into the text box.

Drawing the text
Drawing text in XNA is incredibly easy. First we need to create a SpriteFont object. A SpriteFont is a class provided by XNA that greatly simplifies displaying text by treating fonts as sprites.

To use a SpriteFont, go to Visual C# and right click on Content in the Solution Explorer, then pick Add -> New Item, pick Sprite Font and change the name to font.spritefont.

Now let’s set up the font. Double-click on font.spritefont in the Solution Explorer. You’ll see that it’s actually a XML file that defines the font properties. For now let’s change the FontName to Arial, then save the file. Now that we have the font set up, we can treat it almost exactly like a sprite. Add the following code into Game1.cs:

Instance variable:

SpriteFont font;
String text;

In LoadContent(), under debugColor:

font = Content.Load<SpriteFont>("font");
text = "Hello world!";

In Draw(), under the first spriteBatch.Draw() but before spriteBatch.End():

spriteBatch.DrawString(font, text, new Vector2(textBox.X, textBox.Y), Color.White);

As you can see, it’s almost exactly the same as drawing a sprite. This is where using a Rectangle for the text box shows its second usefulness. Rather than providing a concrete Vector2 position, we just tell it to use the X and Y position of the text box. If we want to change the text box position later on, all we have to do is change the position of the Rectangle. If you run the program now, it should look like this:

textbox2

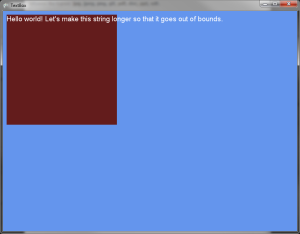
Not too bad-looking, as long as you’re only displaying one line of text. Let’s see what happens though if we change the string to something longer:

textbox3

Aha, what happened here? We can see that the text isn’t word-wrapping to the text box. If you’ve understood the tutorial up till now, it should be obvious why this is the case. The text box and the sprite font are two different sprites and therefore have no effect on each other’s boundaries. Unfortunately, unlike regular sprites, we can’t define a Rectangle boundary for the sprite font, so we’ll have to manually wrap the text ourselves.

Wrapping the text – Brainstorming
Before we start wrapping the text, let’s think for a moment about how we can do it. The first thing you might think of is to print out the characters until the number of characters exceeds a certain amount, then insert a newline. Unfortunately this doesn’t work because it will start wrapping in the middle of words:

textbox4

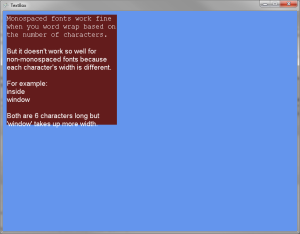
The next solution you might come up with is to wrap on the words rather than the characters. In other words, count the number of characters in the word and add it to the number of characters on the current line. If it exceeds a certain amount, then put the word on the next line. This works fine for monospaced fonts (fonts where all the characters are the same width, like Courier New) but doesn’t work very well for non-monospaced fonts. Take this example:

textbox53

You can clearly see that the word ‘inside’ is a lot narrower than the word ‘window’, but they are both 6 characters each. We can’t tell the width of the string simply based on the number of characters, meaning that we can’t word wrap this way or else we run the risk of certain lines going out of bounds and other lines wrapping too early.

So how do we fix this problem? By now you’re probably out of ideas, decided to stick with only monospaced fonts, or came up with unorthodox solutions such as using an associative array with each character as the key and the width as the value (grossly inefficient, by the way). Fortunately, XNA provides us with the tools we need to make this process a cinch.

Wrapping the text – Implementation
Fortunately for us, XNA provides a function to easily measure the length of a string in pixels. Instead of counting the number of characters in each word, we get the pixel width of each word and see if the current line width plus the word with exceeds the width of the text box. To do this, let’s create a new method called ParseText. Put this new method right after the Draw() method:

private String parseText(String text)
{
    String line = String.Empty;
    String returnString = String.Empty;
    String[] wordArray = text.Split(' ');

    foreach (String word in wordArray)
    {
        if (font.MeasureString(line + word).Length() > textBox.Width)
        {
            returnString = returnString + line + '\n';
            line = String.Empty;
        }
        
        line = line + word + ' ';
    }

    return returnString + line;
}

What this code will do is insert a newline once the length of the current line plus the length of the current word is longer than the width of the text box, and it repeats until there are no more words to process. Here we see the third advantage of using a Rectangle for the text box. We can use the text box’s width as our word wrap point, meaning that we can easily change the text box size and still have the word wrap behave correctly.

Now we just need to change our spriteBatch.DrawString call in the Draw() method so that it uses our new parseText method:

From:
spriteBatch.DrawString(font, text, new Vector2(textBox.X, textBox.Y), Color.White);

To:
spriteBatch.DrawString(font, parseText(text), new Vector2(textBox.X, textBox.Y), Color.White);

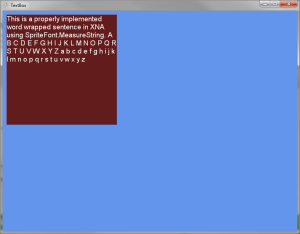
If you run the program now, you should see this (feel free to change the text to whatever you want):

textbox6

The text is now properly wrapped!

Conclusion
This concludes Part 2 of the tutorial. We displayed some text with proper word wrapping inside the text box and the text box position and size can be changed without messing up the wrapping. Part 3 will cover how to make the text ‘type out’ letter by letter.
Go to Part 3

Source code
This is what your Game1.cs should look like at the end of this tutorial.

using System;
using System.Collections.Generic;
using System.Linq;
using Microsoft.Xna.Framework;
using Microsoft.Xna.Framework.Audio;
using Microsoft.Xna.Framework.Content;
using Microsoft.Xna.Framework.GamerServices;
using Microsoft.Xna.Framework.Graphics;
using Microsoft.Xna.Framework.Input;
using Microsoft.Xna.Framework.Media;
using Microsoft.Xna.Framework.Net;
using Microsoft.Xna.Framework.Storage;

namespace TextBox
{
    /// <summary>
    /// This is the main type for your game
    /// </summary>
    public class Game1 : Microsoft.Xna.Framework.Game
    {
        GraphicsDeviceManager graphics;
        SpriteBatch spriteBatch;
        Rectangle textBox;
        Texture2D debugColor;
        SpriteFont font;
        String text;

        public Game1()
        {
            graphics = new GraphicsDeviceManager(this);
            Content.RootDirectory = "Content";
        }

        /// <summary>
        /// Allows the game to perform any initialization it needs to before starting to run.
        /// This is where it can query for any required services and load any non-graphic
        /// related content.  Calling base.Initialize will enumerate through any components
        /// and initialize them as well.
        /// </summary>
        protected override void Initialize()
        {
            // TODO: Add your initialization logic here
            textBox = new Rectangle(10, 10, 300, 300);

            base.Initialize();
        }

        /// <summary>
        /// LoadContent will be called once per game and is the place to load
        /// all of your content.
        /// </summary>
        protected override void LoadContent()
        {
            // Create a new SpriteBatch, which can be used to draw textures.
            spriteBatch = new SpriteBatch(GraphicsDevice);

            // TODO: use this.Content to load your game content here
            debugColor = Content.Load<Texture2D>("solidred");
            font = Content.Load<SpriteFont>("font");
            text = "This is a properly implemented word wrapped sentence in XNA using SpriteFont.MeasureString. A B C D E F G H I J K L M N O P Q R S T U V W X Y Z a b c d e f g h i j k l m n o p q r s t u v w x y z";
        }

        /// <summary>
        /// UnloadContent will be called once per game and is the place to unload
        /// all content.
        /// </summary>
        protected override void UnloadContent()
        {
            // TODO: Unload any non ContentManager content here
        }

        /// <summary>
        /// Allows the game to run logic such as updating the world,
        /// checking for collisions, gathering input, and playing audio.
        /// </summary>
        /// <param name="gameTime">Provides a snapshot of timing values.</param>
        protected override void Update(GameTime gameTime)
        {
            // Allows the game to exit
            if (GamePad.GetState(PlayerIndex.One).Buttons.Back == ButtonState.Pressed)
                this.Exit();

            // TODO: Add your update logic here

            base.Update(gameTime);
        }

        /// <summary>
        /// This is called when the game should draw itself.
        /// </summary>
        /// <param name="gameTime">Provides a snapshot of timing values.</param>
        protected override void Draw(GameTime gameTime)
        {
            GraphicsDevice.Clear(Color.CornflowerBlue);

            // TODO: Add your drawing code here
            spriteBatch.Begin();
            spriteBatch.Draw(debugColor, textBox, Color.White);
            spriteBatch.DrawString(font, parseText(text), new Vector2(textBox.X, textBox.Y), Color.White);
            spriteBatch.End();

            base.Draw(gameTime);
        }

        private String parseText(String text)
        {
            String line = String.Empty;
            String returnString = String.Empty;
            String[] wordArray = text.Split(' ');

            foreach (String word in wordArray)
            {
                if (font.MeasureString(line + word).Length() > textBox.Width)
                {
                    returnString = returnString + line + '\n';
                    line = String.Empty;
                }

                line = line + word + ' ';
            }

            return returnString + line;
        }

    }
}

Filed under: XNA Tutorials, , , , , , , , , , , ,

XNA Tutorial: typewriter text box with proper word wrapping – Part 1

This is Part 1 of 3 and covers how to create a text box for the text to go in.
Go to Part 2
Go to Part 3

Today’s post will be about how to implement a typewriter text box (where the letters appear one after another) with proper word wrapping in XNA. It seems deceptively simple if you’ve never tried it before, but there is a slight issue with text wrapping that you have to account for. Let’s use a tutorial to illustrate what I mean. This tutorial is written for XNA 3.0 but should work on 2.0 also. Also, I assume that you have adequate programming experience.

Creating the text box
Create a new Windows Game project and name it TextBox (or whatever you want to call it), then open up Game1.cs. We’ll begin by creating a text box using a Rectangle. We don’t need to use a Rectangle to display text onto the screen, but we’ll see why this is a good thing later on. First, declare a new instance variable:

Rectangle textBox;

If you don’t know what an instance variable is, it’s a variable that’s defined at the beginning of the class (and inside it) but outside of any methods, so that it’s accessible by any method in the class. Therefore, in Game1.cs, it should be put after the two lines that are already there so that it looks like this:

GraphicsDeviceManager graphics;
SpriteBatch spriteBatch;
Rectangle textBox;

Remember this location because we’ll be creating several more instance variables throughout this tutorial. Ok, now that we declared textBox, we need to set its size and position. Put the following code in the Initialize() method, before base.Initialize():

textBox = new Rectangle(10, 10, 300, 300);

As a side note, this line can be put in the LoadContent() instead of Initialize(). There are some differences between the two methods that you can read more about it in this post but for the purposes of this tutorial let’s leave it in Initialize().

This will put textBox at coordinates (10, 10) set its size to a 300×300 box. If you run the program now, you won’t see anything because we haven’t drawn textBox yet. We will do that next.

Drawing the text box
Drawing the text box requires us to load in a texture. This is because a Rectangle cannot be drawn directly. It only defines a boundary, useful for things such as collision detection and, in our case, the boundary that the texture will be drawn in. If you don’t understand what this means, you should after you draw it. I’ve provided a 1-pixel solid red dot that you can download here (right click and pick Save Image As).

Switch over to Visual C# and import it into your project by right-clicking on Content in the Solution Explorer (by default, the right pane) and select Add -> Existing Item, then add the solidred.png image you downloaded.

Now we need to create a new Texture2D object and load the texture into it. Write the following code:

Instance variable:

Texture2D debugColor;

In the LoadContent() method, under the TODO comment:

debugColor = Content.Load<Texture2D>("solidred");

Now we can draw the text box onto the screen with the debugColor texture in it. Put this code in the Draw() method, under the TODO comment and before base.Draw(gameTime):

spriteBatch.Begin();
spriteBatch.Draw(debugColor, textBox, Color.White);
spriteBatch.End();

Make sure the s in spriteBatch is lower-case or else you’ll be using the SpriteBatch object rather than the spriteBatch variable. Always remember to Begin() and End() your spriteBatch or else nothing will be drawn. The Draw() method works like this: Draw(texture, rectangle, color tint). We tell it to draw the 1-pixel solid red color inside the rectangle boundary with a color of white so it’s not tinted. By default, the texture will tile both horizontally and vertically within the rectangle. If you run the program now, you should see the following image:

textbox1

It doesn’t look very pretty, but this will show us where the text box is located for debugging purposes. This is where using a Rectangle shows its first usefulness. By drawing the red pixel with the Rectangle as its boundary, the pixel will fill the entire Rectangle and we can see what the text box looks like and move it around and resize it easily. When we’re done, we can hide it by either commenting out the Draw() method call (recommended) or by changing the color to Color.TransparentBlack (not recommended because it still draws the box).

Conclusion
This concludes Part 1 of the tutorial. We set up the text box and it’s now ready to get some text drawn in it, which is what we’ll cover in Part 2 of the tutorial.
Go to Part 2

Source code
This is what your Game1.cs should look like at the end of this tutorial. If you’re copying and pasting this code, make sure you import the solidred.png image into your project.

using System;
using System.Collections.Generic;
using System.Linq;
using Microsoft.Xna.Framework;
using Microsoft.Xna.Framework.Audio;
using Microsoft.Xna.Framework.Content;
using Microsoft.Xna.Framework.GamerServices;
using Microsoft.Xna.Framework.Graphics;
using Microsoft.Xna.Framework.Input;
using Microsoft.Xna.Framework.Media;
using Microsoft.Xna.Framework.Net;
using Microsoft.Xna.Framework.Storage;

namespace TextBox
{
    /// <summary>
    /// This is the main type for your game
    /// </summary>
    public class Game1 : Microsoft.Xna.Framework.Game
    {
        GraphicsDeviceManager graphics;
        SpriteBatch spriteBatch;
        Rectangle textBox;
        Texture2D debugColor;

        public Game1()
        {
            graphics = new GraphicsDeviceManager(this);
            Content.RootDirectory = "Content";
        }

        /// <summary>
        /// Allows the game to perform any initialization it needs to before starting to run.
        /// This is where it can query for any required services and load any non-graphic
        /// related content.  Calling base.Initialize will enumerate through any components
        /// and initialize them as well.
        /// </summary>
        protected override void Initialize()
        {
            // TODO: Add your initialization logic here
            textBox = new Rectangle(10, 10, 300, 300);

            base.Initialize();
        }

        /// <summary>
        /// LoadContent will be called once per game and is the place to load
        /// all of your content.
        /// </summary>
        protected override void LoadContent()
        {
            // Create a new SpriteBatch, which can be used to draw textures.
            spriteBatch = new SpriteBatch(GraphicsDevice);

            // TODO: use this.Content to load your game content here
            debugColor = Content.Load<Texture2D>("solidred");
        }

        /// <summary>
        /// UnloadContent will be called once per game and is the place to unload
        /// all content.
        /// </summary>
        protected override void UnloadContent()
        {
            // TODO: Unload any non ContentManager content here
        }

        /// <summary>
        /// Allows the game to run logic such as updating the world,
        /// checking for collisions, gathering input, and playing audio.
        /// </summary>
        /// <param name="gameTime">Provides a snapshot of timing values.</param>
        protected override void Update(GameTime gameTime)
        {
            // Allows the game to exit
            if (GamePad.GetState(PlayerIndex.One).Buttons.Back == ButtonState.Pressed)
                this.Exit();

            // TODO: Add your update logic here

            base.Update(gameTime);
        }

        /// <summary>
        /// This is called when the game should draw itself.
        /// </summary>
        /// <param name="gameTime">Provides a snapshot of timing values.</param>
        protected override void Draw(GameTime gameTime)
        {
            GraphicsDevice.Clear(Color.CornflowerBlue);

            // TODO: Add your drawing code here
            spriteBatch.Begin();
            spriteBatch.Draw(debugColor, textBox, Color.White);
            spriteBatch.End();

            base.Draw(gameTime);
        }
    }
}

Filed under: XNA Tutorials, , , , , , , , , , , ,